


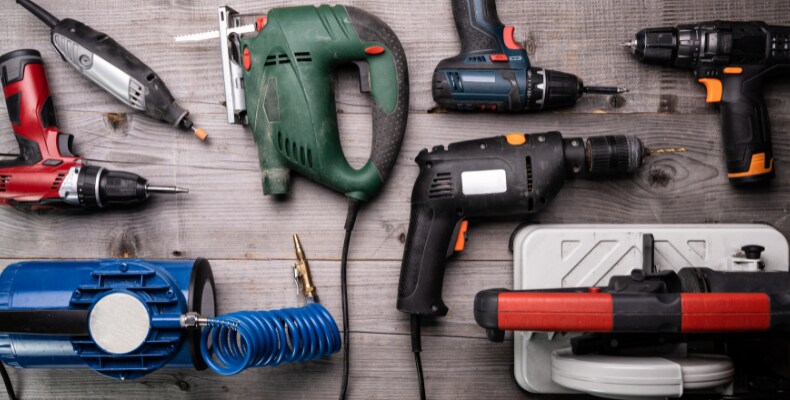
Every garage has a breaking point. It usually arrives when you stack one toolbox on another, carefully balancing heavy cases like a game of Tetris. Everything looks organized until you need the drill buried beneath three boxes of saw blades, extension cords, and accessories. Suddenly, a simple repair becomes an exercise in lifting, shifting, and trying not to send everything crashing to the floor.
Poor tool storage wastes more than space. It steals time, increases frustration, and exposes expensive equipment to unnecessary damage. The solution is to look upward. Walls, structural studs, and overhead areas offer valuable storage space that often goes unused. By moving frequently used power tools off the floor and onto accessible vertical organizers, you can create a workshop where every tool has a place and every project starts with less searching.
Assess Your Wall Estate Before Installing Storage
Before buying organizers, take inventory of your tools and how often you use them. Cordless drills, impact drivers, and screwdrivers deserve convenient positions because they handle everyday tasks. Circular saws, miter saws, and angle grinders need sturdier storage, while battery chargers, spare cases, and accessories can occupy less accessible spaces.
Next, examine your walls. Studs provide strong attachment points for heavy storage systems, but drywall alone may not support substantial loads. For masonry walls, choose suitable anchors and fasteners designed for the material. Measure the available height and width, leaving room for tool handles, batteries, cords, and safe removal. A few minutes of planning helps prevent overcrowding and makes your storage system easier to expand as your collection grows.
System One: French Cleats for Maximum Customization
French cleat systems offer a flexible approach to workshop organization. Two matching strips, each cut at an opposing angle, fit together to support shelves, brackets, and custom tool holders. One strip attaches securely to the wall, while the other mounts to the storage attachment. This design lets you reposition components without repeatedly drilling new holes.
The system works particularly well for heavier power tools, circular saw holders, and dedicated charging stations. Plywood is a popular material, with half-inch or three-quarter-inch sheets offering different levels of strength depending on the design and load. Consistent angles and careful spacing help attachments fit smoothly. Before hanging equipment, verify the fasteners, wall structure, and rated capacity. French cleats are especially useful when your workshop evolves alongside new tools and changing project needs.
System Two: Slatwall and Track Systems for Flexible Storage
Slatwall and track systems provide a clean, adaptable alternative to traditional shelving. Their horizontal channels accept compatible hooks, baskets, bins, and brackets, allowing you to rearrange storage without rebuilding the entire wall. They are useful for hanging corded tools, organizing extension cords, and lifting bulky tool bags or molded carrying cases off the floor.
Material choice matters. PVC panels can suit lighter storage needs, while metal systems may provide greater strength when properly installed and rated. However, appearance alone does not determine load capacity. Check the limits for individual hooks, accessories, panels, and wall attachments. These components may have different ratings, and the weakest connection determines the practical limit. A well-planned track system keeps tools visible and makes it easier to adapt the layout when your equipment changes.
System Three: Vertical Slots and Hanging Racks for Instant Access
Some tools are used so often that storing them inside their original cases creates unnecessary work. Vertical racks solve this problem by giving everyday equipment a dedicated position. A drill dock, for example, can feature slots that support cordless drills and impact drivers by their handles, keeping them upright and ready for use.
The space above the rack can serve as a charging station, provided the surface stays stable, dry, and clear of clutter. Keep batteries away from excessive heat and follow the manufacturer's charging instructions. Arrange tools with enough clearance to remove them without knocking neighboring equipment aside.
A ready-to-use organizer such as the Fleximounts PT2 Heavy Duty Metal Power Tool Organizer offers another practical option. Its seven adjustable drill-holder slots accommodate common cordless tools and help consolidate equipment within a compact footprint. For DIY enthusiasts who want immediate organization without building custom holders, a purpose-built rack can make the transition easier.
System Four: Reimagined Pegboards for Precision Organization
Pegboards remain popular because they are affordable, simple to customize, and especially useful above a workbench. However, basic fiberboard panels may not suit every workshop or heavy tool collection. Metal pegboards and reinforced mounting systems offer alternatives for users who need greater durability.
Locking peg hooks help prevent accessories from lifting out when tools are removed. Custom holders, including suitable three-dimensional-printed mounts, can create dedicated spaces for rotary tools, oscillating tools, angle grinders, and drill-bit sets. Grouping related accessories together makes common tasks easier because the right attachment is always nearby.
Pegboards work best when the layout reflects actual use rather than appearance alone. Place frequently used tools within comfortable reach and outline their positions if helpful. Leave enough room between handles and attachments to avoid tangles. With thoughtful placement, a simple wall panel becomes a practical reference point for your entire workspace.
Build an Ergonomic Triangle for Your Tools
A smart storage layout considers how your body moves, not just how much equipment fits on a wall. Think of your workshop as three vertical zones. The golden zone, between chest and eye level, should hold daily essentials such as drills, drivers, and batteries. These tools are easy to see and retrieve without excessive reaching or bending.
The lower zone, around waist to knee level, can accommodate heavier equipment on stable shelves or suitable pull-out storage. Avoid placing heavy tools overhead, where lifting them down could cause strain or injury. The upper zone works well for rarely used specialty tools, spare cases, and seasonal equipment.
Keep frequently paired items together. Store drill bits near drills, cutting accessories beside compatible saws, and chargers close to designated battery storage. This arrangement reduces unnecessary movement and makes returning equipment after a project much easier. A well-organized workshop should support your workflow rather than force you to work around your belongings.
Conclusion: Stop Stacking and Start Building Upward
A cluttered garage does not necessarily need more square footage. Often, it needs a better way to use the space already available. Vertical storage turns empty walls into functional work areas, protects valuable equipment from floor-level clutter, and makes everyday projects easier to begin and finish.
You do not need to reorganize everything in one weekend. Start with one wall section or install a four-slot drill dock for your most frequently used tools. If you prefer a ready-made solution, the Fleximounts PT2 Heavy Duty Metal Power Tool Organizer provides seven adjustable drill-holder slots in a compact metal design.
Build your layout around the tools you actually use, secure every component appropriately, and leave room for future additions. The goal is not simply a garage that looks tidy. It is a workshop where you spend less time searching for equipment and more time doing what you came to do: building, fixing, and creating.


