When we were younger, summer vacations were all about the beach, the mountains, the sun, the breeze, and a lot of crafting. We look back fondly at those memories that have shaped our childhood. And now that we are at the forefront of shaping our children’s summer memories, one could not forget how crafting helped mold our familial relationships and interests in arts.So, now we have curated some of the hottest and easiest crafts that you can enjoy with your children.
DIY Fruit Fans
Summer would definitely be scorching hot, and your kid will complain every now and then that it is hot. If only you could turn on the AC 24/7, you would, but that is not practical. So, to combat the heat, why not make a craft that will let them stay refreshed when the warm weather rises.What you need:
Popsicle Sticks
Power Drill
Watercolor
Watercolor Pad
Brads or Round Head Fasteners
Glue Gun or Regular Elmer’s Glue
Step-by-step process:
Grab five popsicle sticks (or depends on how many sticks could fit the brads) and drill a hole in the end.
Spread and lay out the grouped popsicle sticks on the watercolor pad. Trace a fan shape. Make sure that the bottom arch is not too far down into the sticks.
Paint some fun and quirky fruits on the watercolor pad. Then, let it dry.
Cut out the fan shape, and glue the back part on the spread-out popsicle sticks.
Fold the paper stick by stick to make the accordion of the fan.
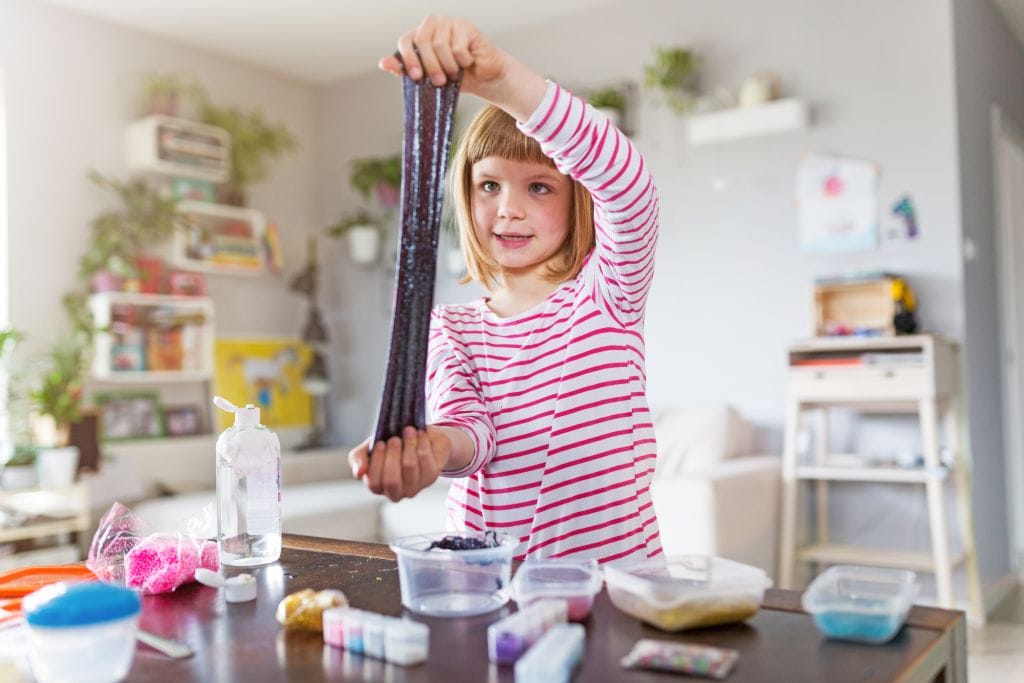
Fish in a Bag Slime
If you cannot go to the beach and google at the fishes in the sea, then bring the beach into your home. This silly little project is so simple and cheap to make, but the kids would definitely love it.What you need:
Plastic Fish Toy (or any sea creatures like sharks, turtles, or even mermaids)
Elmer’s Glue (can be replaced with blue glitter glue for a closer sea look)
Liquid Starch
Treat Bags
Ribbon
Step-by-step process:
Add ¼ cup of water to a bowl. Then add about ½ cup of blue glitter glue. If you are using a clear glue, add blue food coloring or watercolor paint and glitter into the mixture.
Stir briskly. Make sure that the materials incorporate with each other smoothly. You do not want water to float in the mixture.
Then, add ½ cup of liquid mixture and incorporate well by stirring briskly.
Let it sit for 5-10 minutes.
Knead the slime mixture with your hands until it feels stretchy and bouncy.
Place them in the treat bags along with the plastic sea creature toys.
The Workbench to Help You With Crafting
You can categorically say that the first-ever purchase or investment that you will spend on is a reliable workbench. Workbenches are essential for any garage workshop or activities. Aside from the weight of the materials like wood and metal that we usually use, which are on the heavier side, the machines also need a sturdy base they can be mounted on. The investment in buying these garage workshop tools is no joke, so to make our money's worth, we also look at the other items we can utilize.Alongside our materials, we should also ensure that our working environment promotes safety and is conducive to working even for long hours. A wobbly workbench raises a red flag when it comes to your protection. The garage can quickly become a ground for unwanted accidents, especially when working with tools and machines that require electricity.An excellent workbench feature is a built-in drawer where you can store small items you frequently use. It is ergonomic and saves you time and effort in constantly reaching the tools whenever you need them. Imagine getting up from your seat each time; you would need small tools such as rulers, pencils, tape measures, and the like. And you have built-in storage aids to keep your garage tidy and clean. It cannot be emphasized enough that your safety and the project's success greatly depend on how organized you keep your workspace.We should always think long-term when thinking of garage solutions. Items like workbenches have cheaper alternatives, like making use of tables already available in the house, but remember that most of these are not designed to handle heavy work. So, it is always recommended to purchase a garage workbench. And we assure you that this is the kind of money spent that will give you a return on investments not only in terms of finances but also concerning your safety and productivity.There are a lot of workbenches that you can choose from that are currently available in the market. But we advise that you look for a reliable brand that many trusts. One such reliable brand is Fleximounts. And among its wide array of products, a workbench that you can maximize when working is the Fleximounts WB201 Durable Workbench with Built-in Drawer.Designed with high-quality craftsmanship, the durable frame of this workbench is made of cold-roll steel. It has a convenient built-in storage drawer that is embedded in the worktop. The pull-out drawer provides seamlessly integrated storage space for your workshop supplies. The modern design blends in perfectly while keeping your belongings out of sight and neatly put away.Protecting the worktop is a feature that is made especially to last the wear and tear of things. It is understandable that garage workshops tend to be on the heavier side of activity, and the materials and tools used are mostly made of metals and bear heavy weight. The workbench's surface is designed in such a way that it is free of scratches and chips due to its material–made of 1-in thick rubber wood that is sealed with varnish.Garages often have uneven flooring. So, to enjoy a stable work surface, the workbench has adjustable feet to make it easy to level the workbench as deemed fit.The WB201 is an all-purpose workstation that is suitable for many purposes–both commercial and personal. It is fit for use in your home space, garage, warehouse, mailroom, basement, workshop, or office.Moreover, the workbench is shipped within three business days after order checkout. Fleximounts also offers free shipping and 30-day returns, if needed.
 DIY Fruit Fans