Workbenches are a must-have for any garage workshop, whether making repairs, finishing DIY projects, building anything from scratch. A decent work surface may be good for now, but if we are thinking long term, then you must pick a workbench that is scratch-free and can handle the weight and work that you will do. Plus, it should be a safe workspace that allows electrical, mechanical, and other tasks. A portable yet durable one takes the cake as your workspace can be moved depending on your needs and the space available in the garage.
Utilizing a sturdy workbench not only makes your job easier but it also offers to maintain an organized workstation. We could not stress enough the importance of having a neat workspace. It aids in the faster completion of projects, and most of all, it secures your safety, especially when working with tools that can cause injuries when mishandled.One such reliable workbench that you can maximize when working is the Fleximounts WB102 Manual Height Adjustable Workbench, which is currently priced at $398.99.Height-adjustable workbenches are heaven-sent. There are tons of work and activities that rely on a stable worktop. If you add flexible height to the features, this product is a winner. The user can manually adjust the level of the frame to match the desired size. So, whether you like working either standing or sitting, you can count on this workbench.The Fleximounts WB102 Manual Height Adjustable Workbench lets the user confidently handle any sitting or standing work with maximum efficiency. It enables you to elevate your workstation to its ideal height, with a height adjustment range of 29.5 inches to 44.1 inches. The extra-large crank handle offers smoother operation than standard cranks, so you can easily lift the desk, even with heavy loads, such as items like the computer set, toolboxes, car cleaning machine, paints, and many more. And best of all, you would never need tools to adjust the height of the table legs as is necessary for other workbenches without a crank handle.The WB102 has a solid construction, is made of a 1.5 mm cold-roll steel frame, and holds up to 500 lbs. Its worktop table uses solid rubberwood as a surface and has desktop dimensions of 47.2 inches x 23.6 inches x 1 inch, which offers plenty of space to work on.You can also use it as a garage workbench, home office desktop, or even sewing and crafting table.
What’s in the box
Here are the rack parts included in the package:
1 Desktop
1 Lifting Column (right)
1 Lifting Column (left)
2 Feet
2 Support Bars
2 Cross Beams
1 Transmission Rod and Transmission Tube
1 Bottom Crossbar
1 Cover
1 Crank Holder
1 Crank Handle
Here are the set of accessories included in the package:
18 M6 x 16 mm Bolts
6 M6 x 10 mm Bolts
1 M5 x 6 mm Bolt
4 M8 x 10 mm Bolts
4 M8 Washers
1 Allen Key 5x5, 4x4, 3x3
8 M6 x 30 mm Bolts
Easy step-by-step guide when installing the WB102
Install the crossbeam.
Begin by attaching the support bars to the crossbeam using the M8 x 16 mm bolts and tighten with a 5 x 5 hex key.
Install the desktop.
Attach the support bars and the cross beam installed in step 2 to the desktops using M6 x 16 mm bolts, and tighten with a 4 x 4 hex key.
Install the lifting column.
Install the lifting columns (both left and right) to the sides of the crossbeam using the M6 x 16 mm bolts, and tighten with a 4 x 4 hex key. Make sure that you keep the right and left lifting columns at the same height when installing.
Install the feet.
Install the feet and lifting columns (both left and right) together using M6 x 30 mm bolts, and tighten with a 4 x 4 hex key.
Install the transmission rod and cover.
First, insert one end of the transmission rod (six-angle bar) to the left lifting column. (Note: the transmission rod can be inserted either in the left or right lifting column.)
Rotate the fine adjustment slightly to the hole position when inserting.
After alignment of hole position, fix with M5 x 6 mm bolts, and tighten with 3 x 3 hex key.
Connect the cover with both left and right lifting columns using M6 x 10 mm bolts, and tighten with a 4 x 4 hex key.
Install bottom crossbar.
Attach the bottom crossbar to both the left and right lifting columns using M8 x 10 mm bolts, and tighten with a 5 x 5 hex key.
Install crank holder and crank handle.
Unscrew the preinstalled bolts with a 4 x 4 hex key. Install crank holder, then re-screw and tighten with a 4 x 4 hex key.
If the transmission rod and tube are inserted from the left lifting column, install the crank holder and crank handle on the left lifting column instead.
How to use the crank handle
Pull out the crank handle when in use. To lock it after use, push the crank handle inward.
Safety tips
The workbench can be installed effortlessly by a lone individual as the installation guide is easy to comprehend and very straightforward. However, if you are unsure about any of the steps in the installation guide, feel free to contact customer service, or ask for help from more experienced individuals. Also make sure that before attempting to install the workbench, carefully check all materials included in the package. Also, after finishing installing, ensure that the assembly of the workbench is correct and complete before you start using it.If you have children or pets at home, keep the small parts in the package such as the screws out of their reach as these materials are choking hazards.As for the waste disposal warning, this product should not be disposed of as household waste. In fact, the workbench should be recycled to prevent further damage to the environment. If you are unsure how to properly recycle and dispose of it, contact the distributor and manufacturer for recycling assistance.
 Utilizing a sturdy workbench not only makes your job easier but it also offers to maintain an organized workstation. We could not stress enough the importance of having a neat workspace. It aids in the faster completion of projects, and most of all, it secures your safety, especially when working with tools that can cause injuries when mishandled.
One such reliable workbench that you can maximize when working is the Fleximounts WB102 Manual Height Adjustable Workbench, which is currently priced at $398.99.
Height-adjustable workbenches are heaven-sent. There are tons of work and activities that rely on a stable worktop. If you add flexible height to the features, this product is a winner. The user can manually adjust the level of the frame to match the desired size. So, whether you like working either standing or sitting, you can count on this workbench.
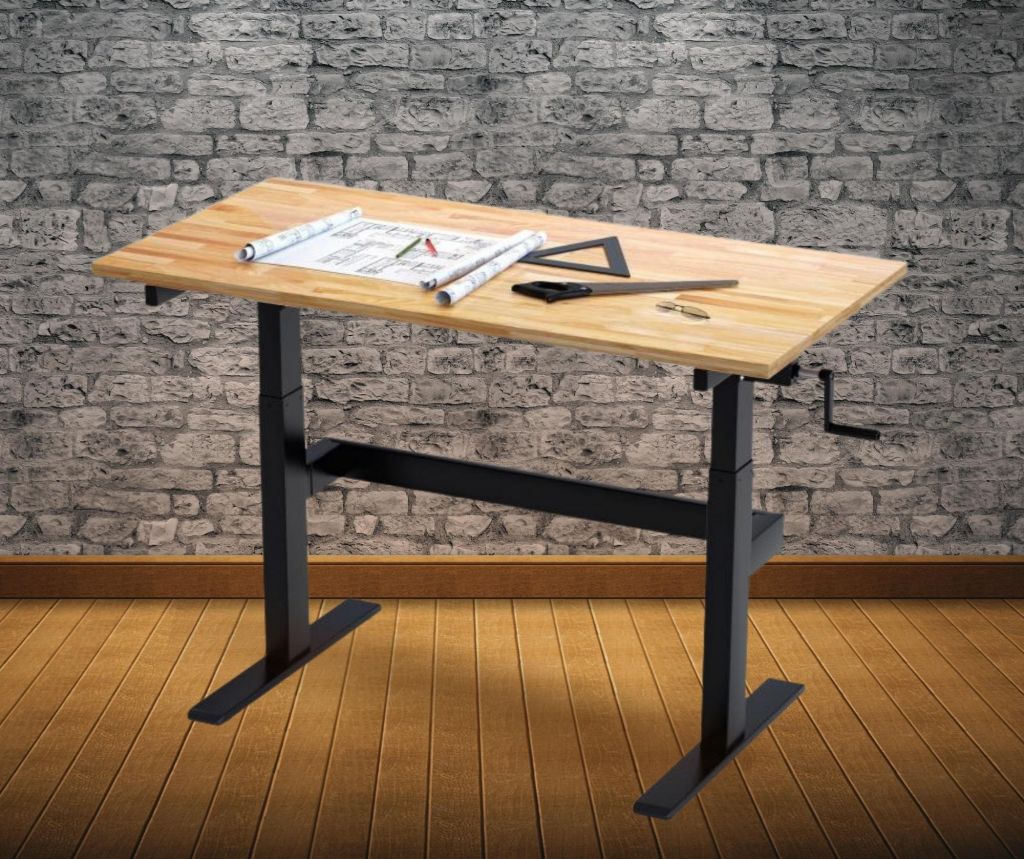
The Fleximounts WB102 Manual Height Adjustable Workbench lets the user confidently handle any sitting or standing work with maximum efficiency. It enables you to elevate your workstation to its ideal height, with a height adjustment range of 29.5 inches to 44.1 inches. The extra-large crank handle offers smoother operation than standard cranks, so you can easily lift the desk, even with heavy loads, such as items like the computer set, toolboxes, car cleaning machine, paints, and many more. And best of all, you would never need tools to adjust the height of the table legs as is necessary for other workbenches without a crank handle.
The WB102 has a solid construction, is made of a 1.5 mm cold-roll steel frame, and holds up to 500 lbs. Its worktop table uses solid rubberwood as a surface and has desktop dimensions of 47.2 inches x 23.6 inches x 1 inch, which offers plenty of space to work on.
You can also use it as a garage workbench, home office desktop, or even sewing and crafting table.
Utilizing a sturdy workbench not only makes your job easier but it also offers to maintain an organized workstation. We could not stress enough the importance of having a neat workspace. It aids in the faster completion of projects, and most of all, it secures your safety, especially when working with tools that can cause injuries when mishandled.
One such reliable workbench that you can maximize when working is the Fleximounts WB102 Manual Height Adjustable Workbench, which is currently priced at $398.99.
Height-adjustable workbenches are heaven-sent. There are tons of work and activities that rely on a stable worktop. If you add flexible height to the features, this product is a winner. The user can manually adjust the level of the frame to match the desired size. So, whether you like working either standing or sitting, you can count on this workbench.
The Fleximounts WB102 Manual Height Adjustable Workbench lets the user confidently handle any sitting or standing work with maximum efficiency. It enables you to elevate your workstation to its ideal height, with a height adjustment range of 29.5 inches to 44.1 inches. The extra-large crank handle offers smoother operation than standard cranks, so you can easily lift the desk, even with heavy loads, such as items like the computer set, toolboxes, car cleaning machine, paints, and many more. And best of all, you would never need tools to adjust the height of the table legs as is necessary for other workbenches without a crank handle.
The WB102 has a solid construction, is made of a 1.5 mm cold-roll steel frame, and holds up to 500 lbs. Its worktop table uses solid rubberwood as a surface and has desktop dimensions of 47.2 inches x 23.6 inches x 1 inch, which offers plenty of space to work on.
You can also use it as a garage workbench, home office desktop, or even sewing and crafting table.