Step-by-Step Guide to Installing the Classic Overhead Garage Storage Rack GR Series
Oct 12, 2021
12974 views
Trust us when we say that you do not need to be a pro in construction when installing our overhead garage storage racks. Even newbies can assemble the racks in no time. Everything you need to know when it comes to installation, you can find in the package. Moreover, in this article, we will let you follow the step-by-step guide for easier understanding.
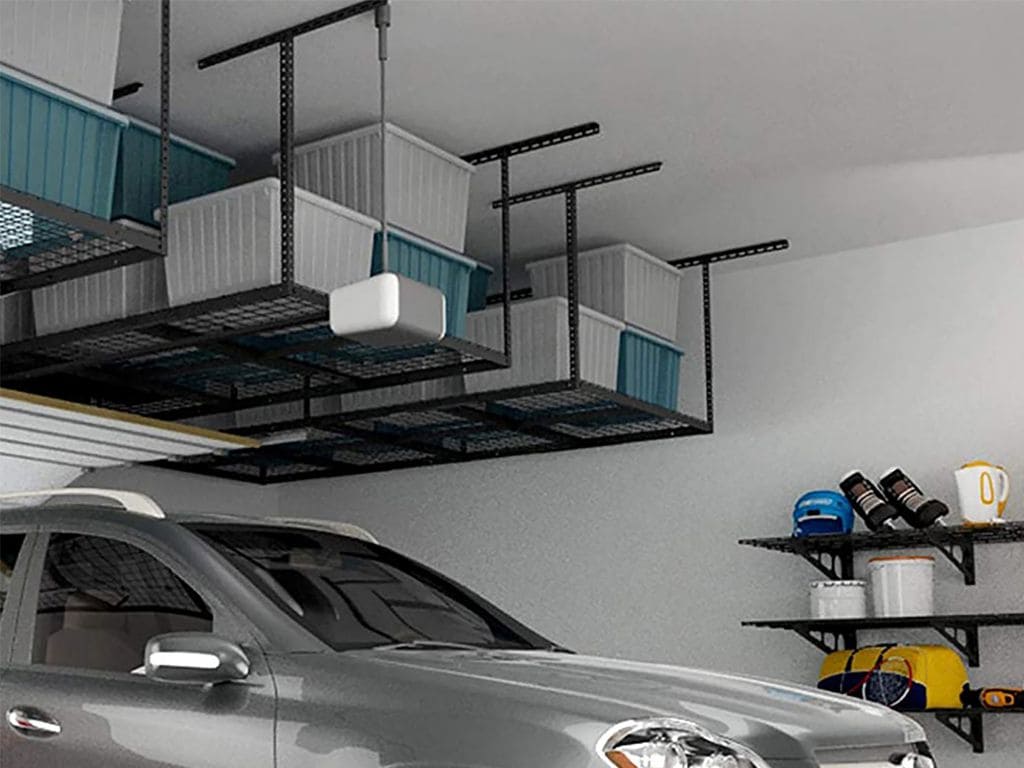
Fleximounts Classic Overhead Garage Storage Rack GR Series
Neat and organized garage space is on everyone’s dream list. And the best way to achieve this is by installing overhead storage. Maximizing the ceiling space will free up floor space for the needed activities done in the garage and storing more oversized items such as your vehicles or workbenches. We cannot emphasize enough how overhead garage storage racks can add value to your garage space by keeping your seasonal items, workshop stuff, and other things that don’t belong anywhere else in the house.This Classic Overhead Garage Storage employs a ceiling-type installation with safe and high loading capacity due to its high-quality construction. The sturdy and stable design is made possible as the grid design and frame are welded together, and the material used is heavy-cold rolled steel. It can carry a weight of up to 400-600 lbs. Moreover, Fleximounts provides thicker screws compared to other brands that also offer overhead garage storage. Furthermore, the Fleximounts screws go through strict tests.This garage storage is height adjustable from 22” to 40” ceiling drop-down. It is perfect for customizing the height fit perfectly for you and your garage space, and it is also suitable for securing either ceiling studs or solid concrete ceilings.The integrated grid design is made for easier assembly. Optimizing overhead garage storage is advantageous in avoiding flood damage by storing your things off the garage floor, protecting your items. It will also make your garage look neat and get away from insects and rodents.
What’s in the box
Everything you need is neatly tucked in one box: all the necessary hardware and instructions are included. An installation template is also included to help you devise a plan to store your stuff in the most efficient manner possible. Indeed, this will give you the tips and know-how in organizing your garage without a sweat.Inside the single box, you will find the following: the shelves, rack installation manual, three bags of screws–wood screws, installation screws and bolts, and cement installation.
Tools needed when installing the GR Series
The tools you will be using to assemble and install the Fleximounts Classic Overhead Garage Storage Rack GR Series are simple, and they are all the first tools you will need to buy when you are first building your toolbox.
Marker
Drill
Drill bit
½ socket
½ wrench
Stud finder
Tape measure
Install the GR Series rack in these easy-to-follow steps
In an open area in your garage or lawn, take out all the contents of the box. You should have four shelves. The total size of these all together is 4x8 ft.
Layout the hanging brackets. Group them according to their ends.
Start with the support brackets. We will join each 4x4 square together. You will complete this task four times.
Do not join the two 4x4 squares together yet.
Ensure that you are using the standard flat top bolts.
Once the support brackets are on, you can fill the empty bolt holes between the two brackets. Do this for both sides and tighten completely.
Once complete, take the two pieces and move them out of the way.
Now, grab your stud finder. Then, find the studs in your ceiling.
Take a pencil. And using the cardboard stencil provided, make your markings.
Before trying to drill in your screws, take your drill bit and drill a couple of holes.
With the wood screws provided, mount your first ceiling bracket. You will observe that the Fleximounts screws are thicker than the standard industry competitors.
Once the first bracket is up, immediately install the remaining five brackets.
Start with the second center bracket.
Measure 48 inches from your other bracket. You can check with your stud finder, but if your first bracket is mounted correctly, the second will be in the stud as well.
Use the exact steps you followed in the first bracket. And after your measurements are accurate, you can now mount the second bracket into the ceiling.
From the center of the first bracket, measure out 48 inches.
Align the next bracket to the center.
Then use the cardboard template to make the marks.
Repeat the same process as you did with the others.
Drill your pilot holes. And then mount the ceiling bracket. These two steps are then just repeated to hang the rest of the ceiling brackets.
Once you have all the six ceiling brackets up, you can move on.
For the next step, you need to figure out how low you want the racks to hang. A good rule of thumb is to raise the garage door and measure down from your ceiling. Give yourself a good six inches from the door to the rack.
Pull out all the bolts with the round heads. Under the round, heads are small squares. They need to go into the sides of the extender pieces with the square holes.
Take your four-corner hanging arms and mount them to your ceiling brackets. At this point, just hand tight. Remember that you are just mounting the four corners. Your two center pieces should still not be mounted.
Going back to your last two center arm brackets, mount them the same length as your corner arms.
Take them back up. Mount them to the center ceiling brackets. And again, just hand tighten them. Ensure that while mounting them that the lips of each are facing inwards.
Take the first 4x4 piece that you previously put together and take it up the ladder. If you can find someone to help you, that’s great. But if you have to do it alone, place it on top of the ladder and then put it in the corner brackets first. Then put it on the lips of the center brackets.
Have a few screws in your pocket for the center bracket. Place one on each side and finger tighten them.
Then go back and place the screws in the corner brackets. While you’re at it, completely tighten them into place. The only reason we finger-tightened the tops was to allow for some play. This will help you when installing the shelf.
Like the first shelf, place your corners in position first. Then, place the other side on the center arm lip.
With a screw, place one on each side of the center arm. Then go back and put one in the corner of the corner arms.
After this is complete, you can mount the two shelves together.
Once your two shelves are mounted together, you can go back up to the ceiling brackets and tighten all remaining screws.
Double-check all screws before you are done. Ensure that all are thoroughly tightened.
You can now load up your ceiling shelf and declutter your garage.
 Fleximounts Classic Overhead Garage Storage Rack GR Series